


What is the most skillful way to lay cavaletti for lunging?
Dear horse friends!
Was it only me, or do other horse trainers also have the hassle in the quick, perfect laying of cavaletti for lunge work?
To find distances exactly and if necessary to lay a nice radius, to find the exact line etc… is often not so easy.
Over many years, I have developed some really practical facilitations that I would like to share with you. I’ll share 7 of them with you here as concrete, practical tips for positioning cavalettis, which will allow you to focus on the most important thing when lunging – the horse.
Tip #1: The appropriate distances:
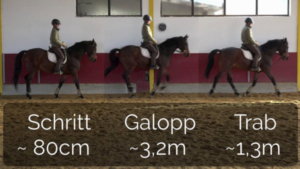
Walk: ~80cm / Canter ~3,2 Meter / Trott ~ 1,3 Meter – for an average warmblood horse
Before we even begin to set up gymnastic rows, we should be clear about what the ideal distances are for this. As a rule of thumb, we can assume 80cm for the walk, 1m30 for the working trot and around 3m20 for the working canter for an average warmblood size horse. This is usually quite good for the start – whether it should be a little shorter or longer depends on the working situation with our horse, to which we may have to adapt.
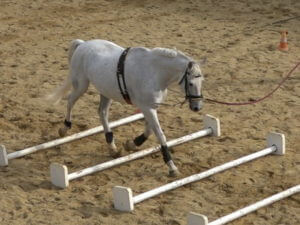
The purpose of evenly positioned gymnastic rows lies in the fact that the horse can find an equally even beat and is not forced above the task to irregularities in the gait or even to stall.
Tip #2: Use the whip as a measuring stick:
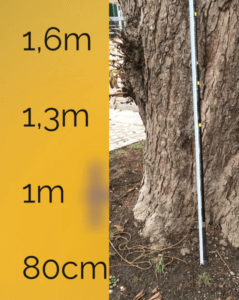
You can, of course, take your own stride or foot length as a measure – but then this is not quite as accurate from day to day. I always have a measuring stick with me when lunging – and quite practically my lunge whip. On it I marked the most important measurements with colored tape – 80cm for walk distance – 1m30 for trot and 1m60 – which, taken 2 times, gives me the canter distance of 3m20. In addition, I marked 1m, which serves me as an additional guideline when setting up jumps. -> Now I can start with the placement.
Tip #3: Start easy, then increase:
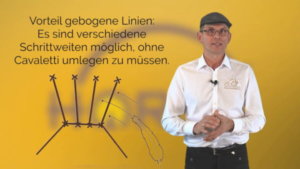
It is very helpful to practice straight lines first. If these work well, cavaletti or pole rows in a fan shape will be easier later. The advantage of straight lines is that you don’t have to hit the line exactly, and still usually get over the line in good time. The advantage of fan rows is that you can lengthen or shorten the kicks without having to fold them over, depending on the line. However, this requires a very good guidance of the line.
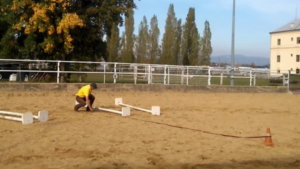
Tip #4: Put on a straight line:
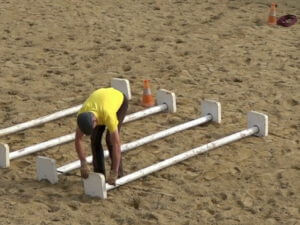
For this I now position the first cavaletto, take the whip, orient myself to the 80cm mark and use it to perfectly position the second cavaletto – etc.. e voila – they lie fast, even and fitting.
The same for trot with 1m30
Tip #5: Adapt the distances to the gait of the horse:
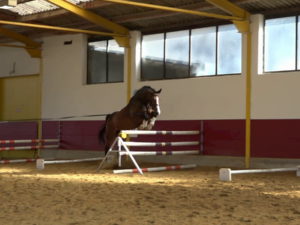
A practical example for canter when lunging is e.g. the construction of a jump row where you get an orientation guide as said, if you put the dimensions 1m60 two times in a row and thus get a canter distance of 3m20. +/- 20cm depending on the horse and gait can be easily estimated by eye. With a large horse, for example, I add 30cm by eye. With a smaller horse that may cover less ground per jump, correspondingly less.
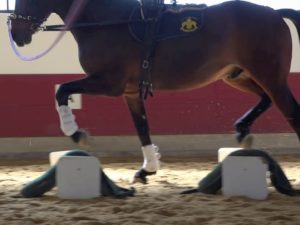
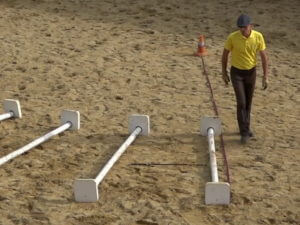
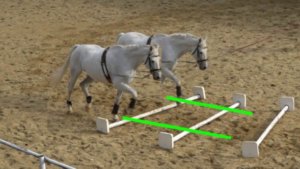
Tip #6: Lay a perfect row in fan shape:
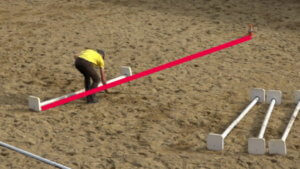
To ensure that the radius is perfect when placing the cavaletti – which is usually the greatest difficulty – I use a pylon and the lunge additionally to help. The pylon marks the center of the later lunging circle. The loop of the lunge is put over the cone and functions from then on as a geometric circle. Exactly at the end of the lunge the first Cavaletto is put sideways. The lunge should be about 8 meters long. Then with the whip in this case the measure 1m30 is cut off. The next Cavaletto is again placed at the end of the lunge parallel to it – etc…
I usually take the 1m30 more towards the center of the circle, which gives a measurement of around 1m60 on the outside of the fan. This in turn corresponds to 2x80cm – exactly two steps.
I can now practice trotting further in with shorter steps or further out with longer steps. At the same time, the horse can be made to walk on the outside – all without having to move the cavaletti.
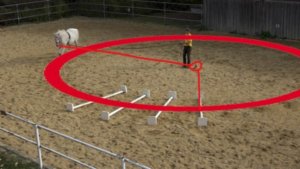
Tip #7: Optimal orientation point for the center of the circle:
If you now simply leave the pylon in place, you have a wonderful marker of the ideal point where you should stand as a lunge leader when the horse goes straight over the poles. You then automatically stand in the center of the circle of the cavaletti circle. This is the best position to enable the horse to walk perfectly on a circular line with constant distances over the cavaletti.
Good luck trying it out!
If I can make lunging easier for you with these practical tips, then I am very happy.
If you are interested in more professional work with horses, I would like to invite you to book e.g. one of my lunging clinics – to be found under dates. Or you can organize a lunging course with us yourself. You can find all the necessary documents here under this link.
Alexander Kronsteiner, Alexanderhof